Vous souhaitez exporter un menu de navigation d'un site WordPress et l'importer dans un autre ?
Maybe you’re moving your entire website or just want to reuse a menu structure on a different site. Either way, importing and exporting menus can save you a lot of time compared to recreating them manually.
By default, WordPress import/export functionality only lets you transfer menus as part of a full site export, which means you can’t move just the menus on their own. This can feel confusing if you’re a beginner, but don’t worry, it’s easier than it sounds.
In this post, you’ll learn step by step how to import and export navigation menus in WordPress. But before we dive into the process, let’s take a quick look at how WordPress handles import and export features.
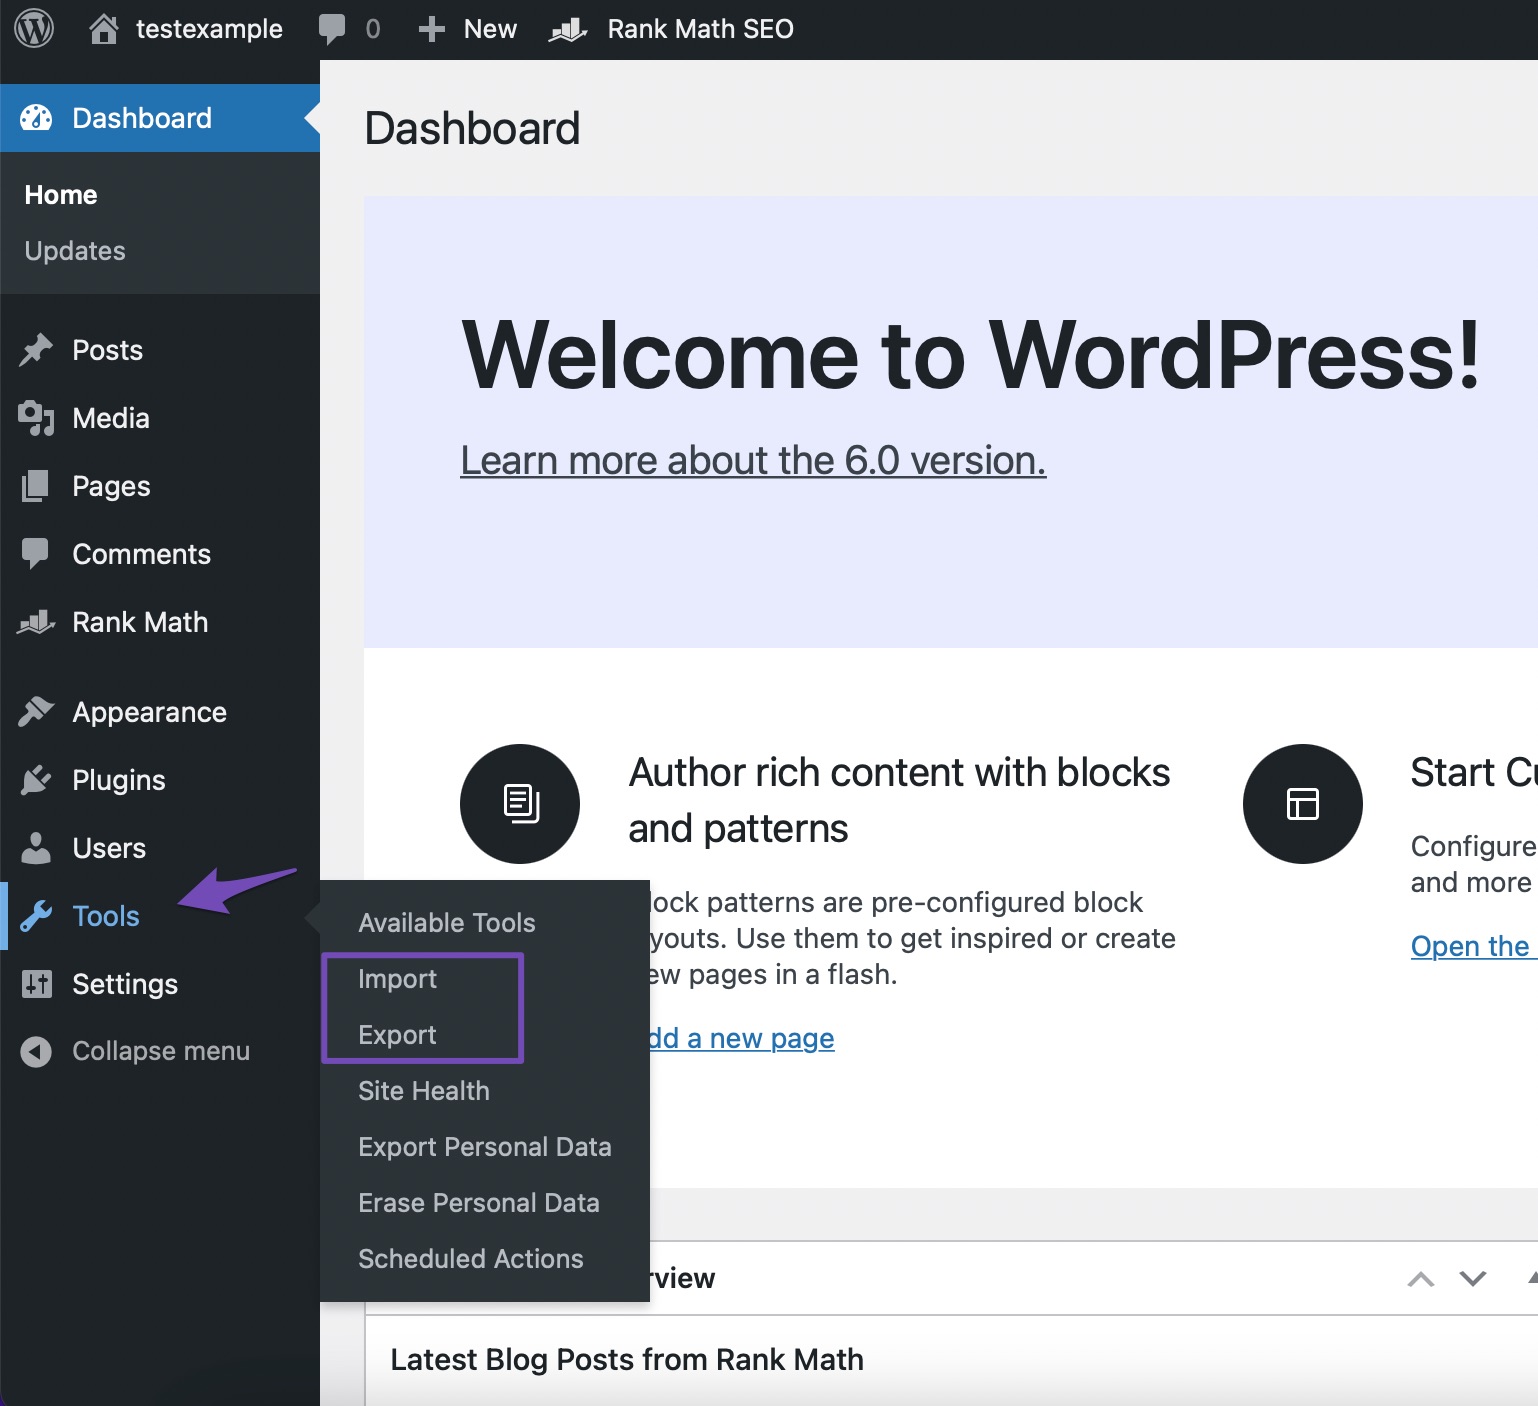
You’ll find import and export functionality built into every Wordpress website. In your WordPress dashboard, you can locate these under Tools → Import et Tools → Export, comme indiqué ci-dessous.
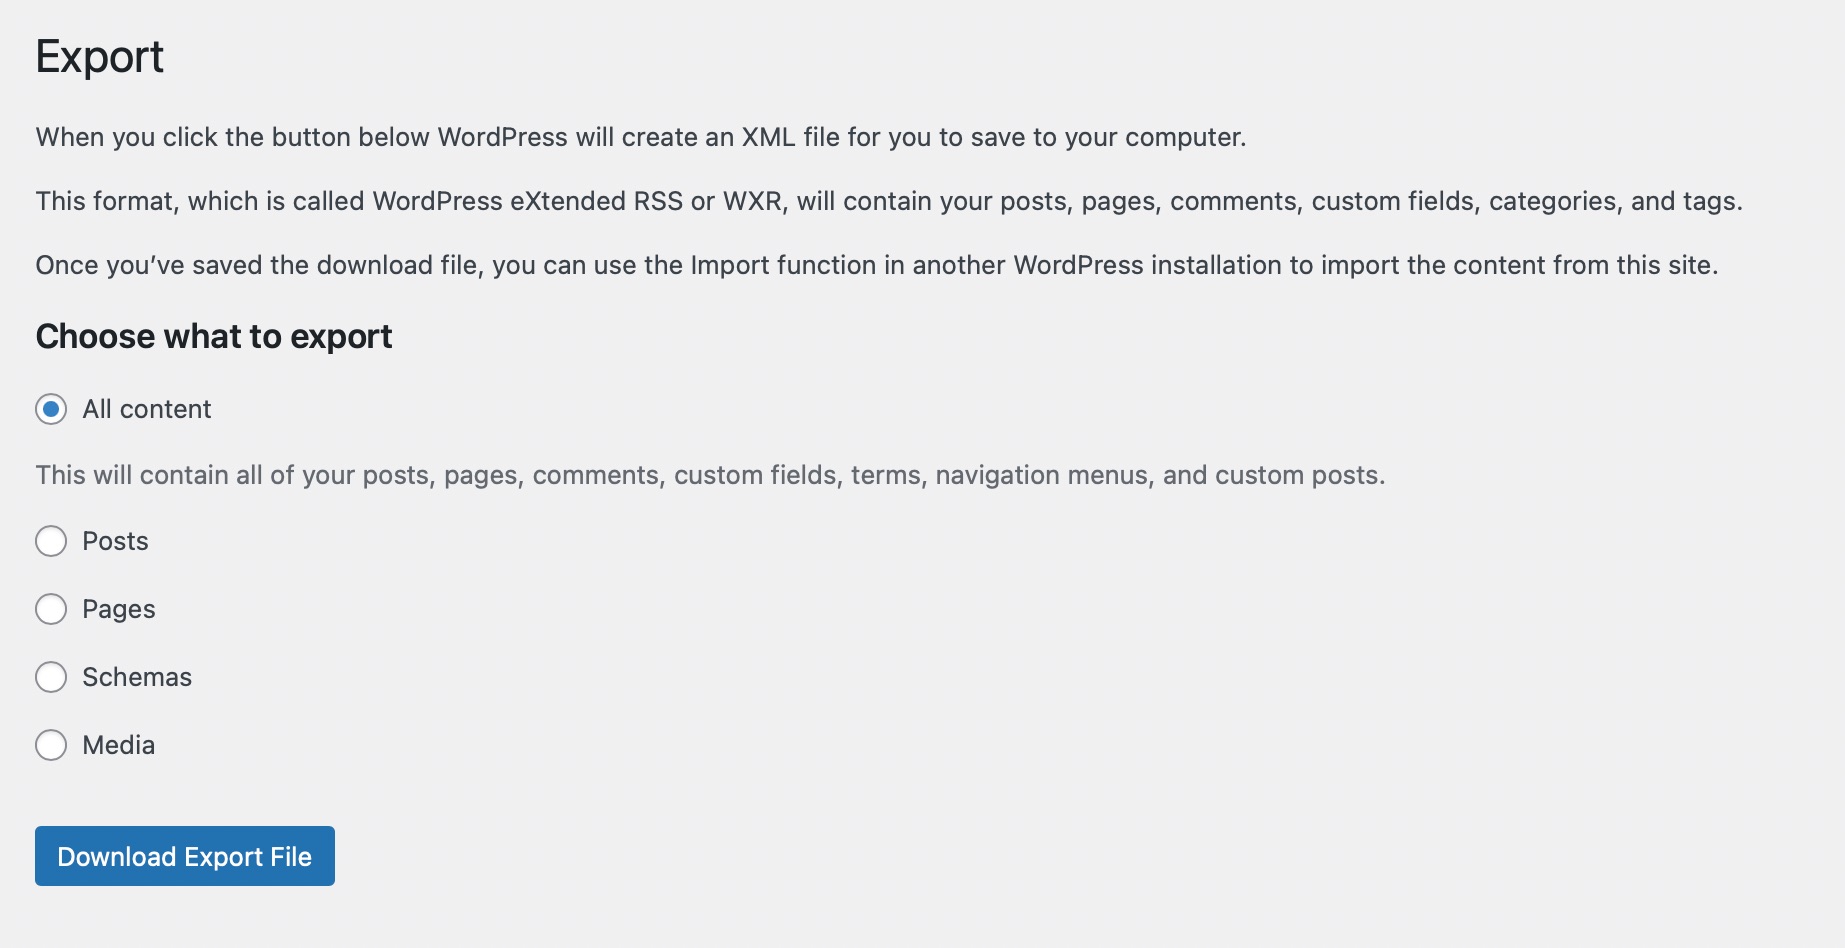
You can export all the content on the Export page or export only your posts, pages, Schemas, and media.
The Import page helps you import posts or comments from other systems to your site.
2 How to Import and Export Navigation Menus in WordPress
Let us now discuss how to import and export navigation menus in WordPress.
2.1 Export WordPress Menus
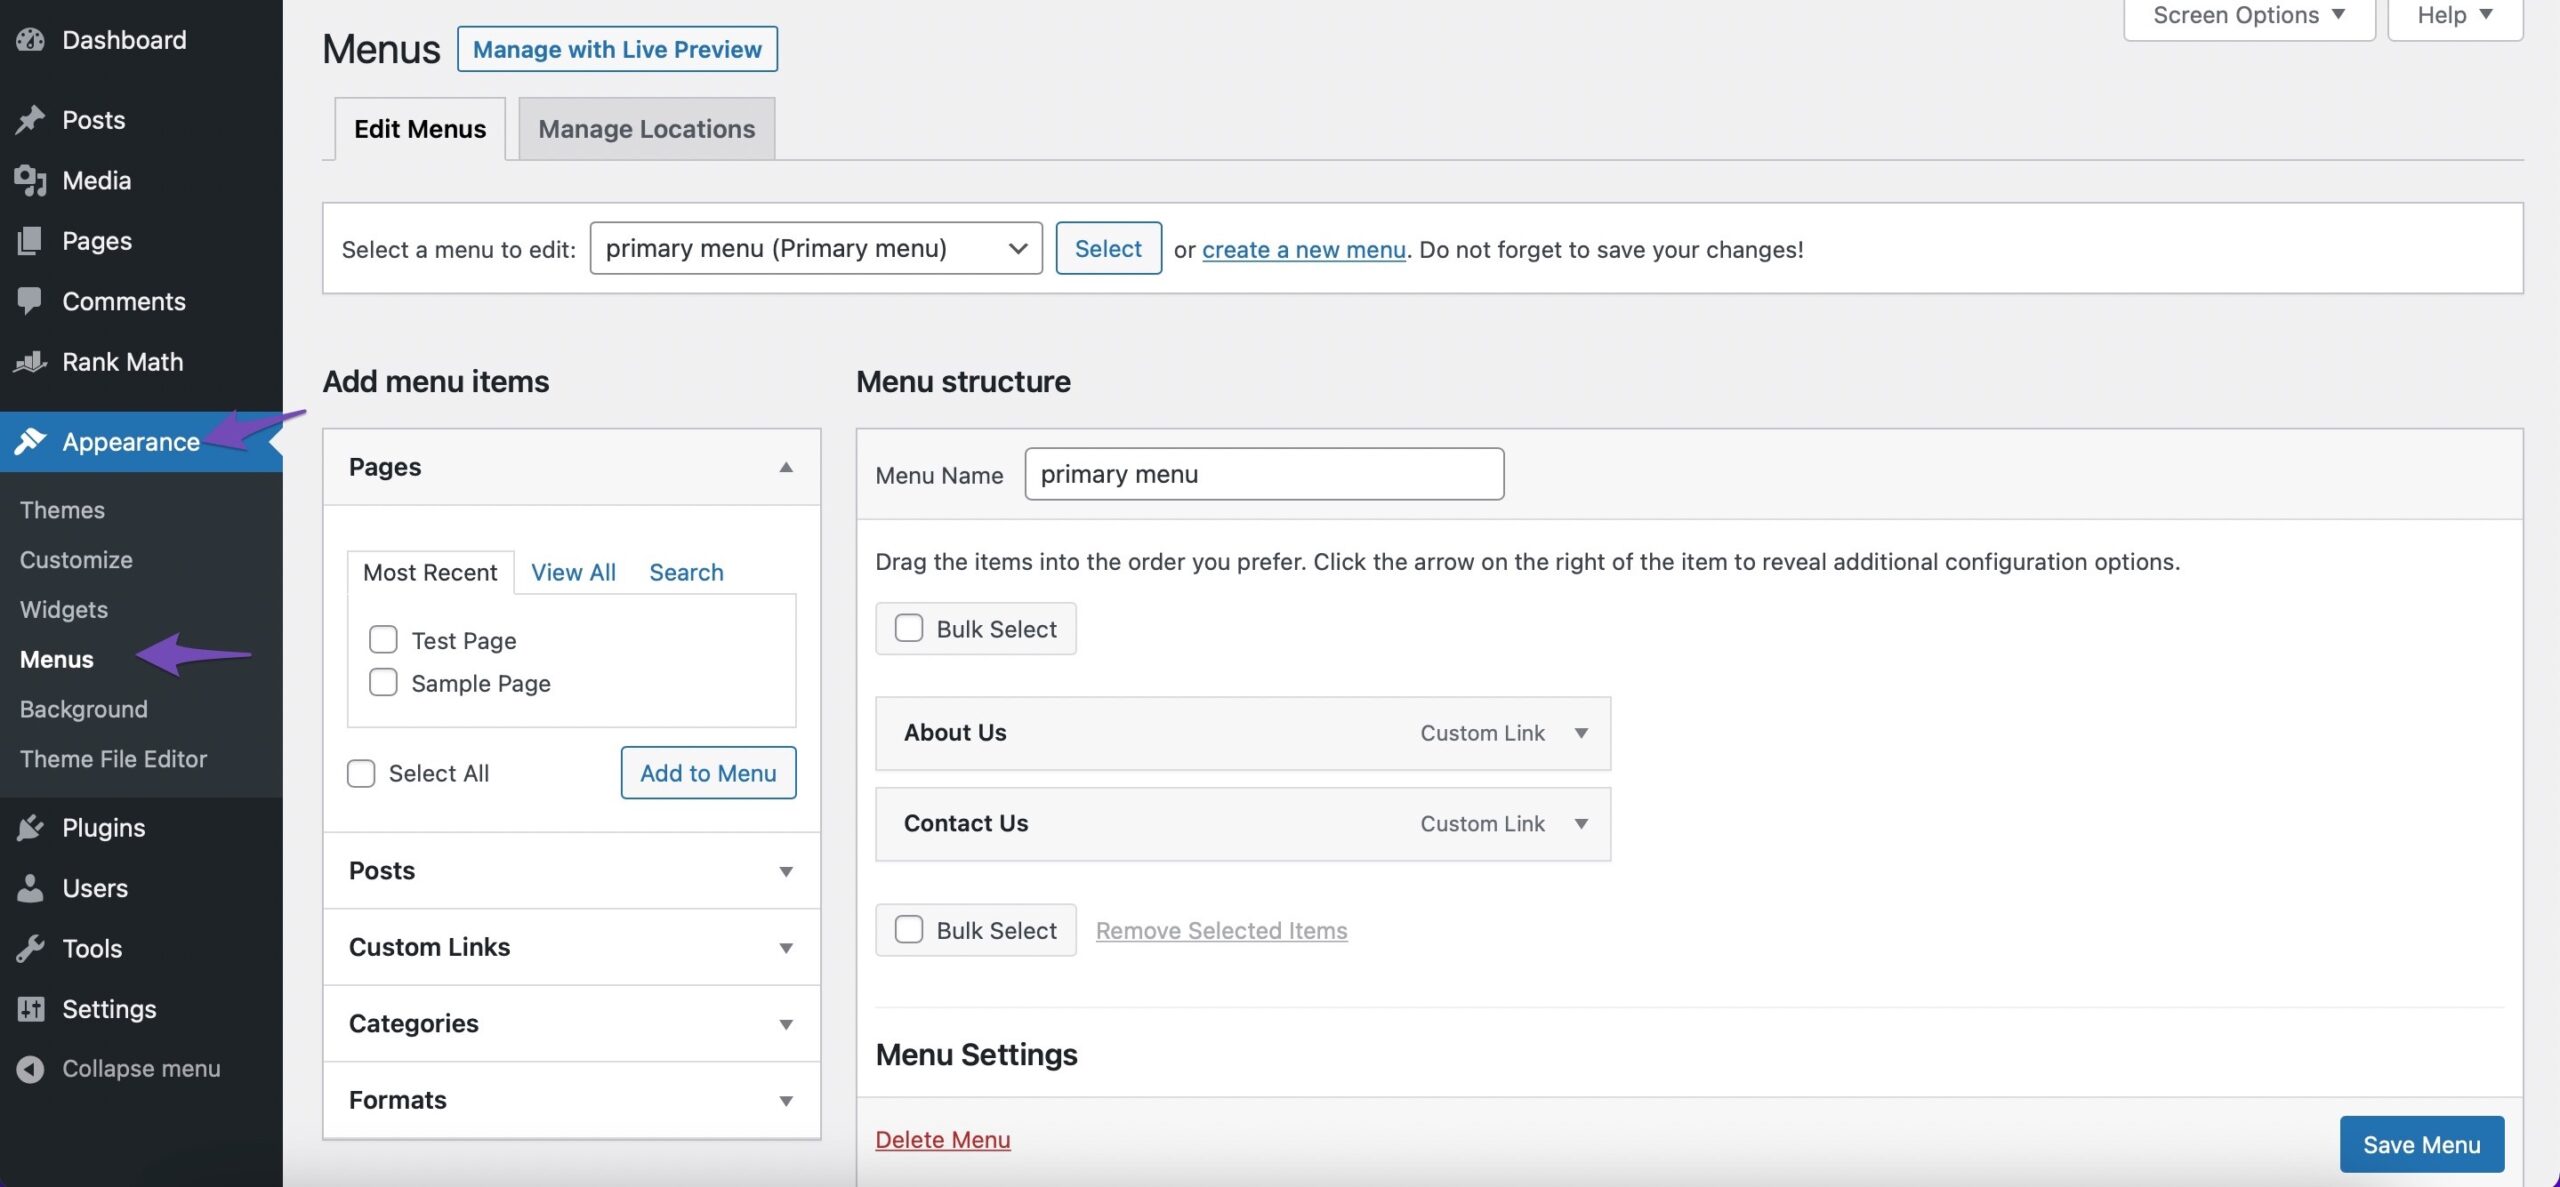
Before exporting your navigation menu, you can have a look at your menu by navigating to Appearance → Menus depuis votre tableau de bord WordPress.
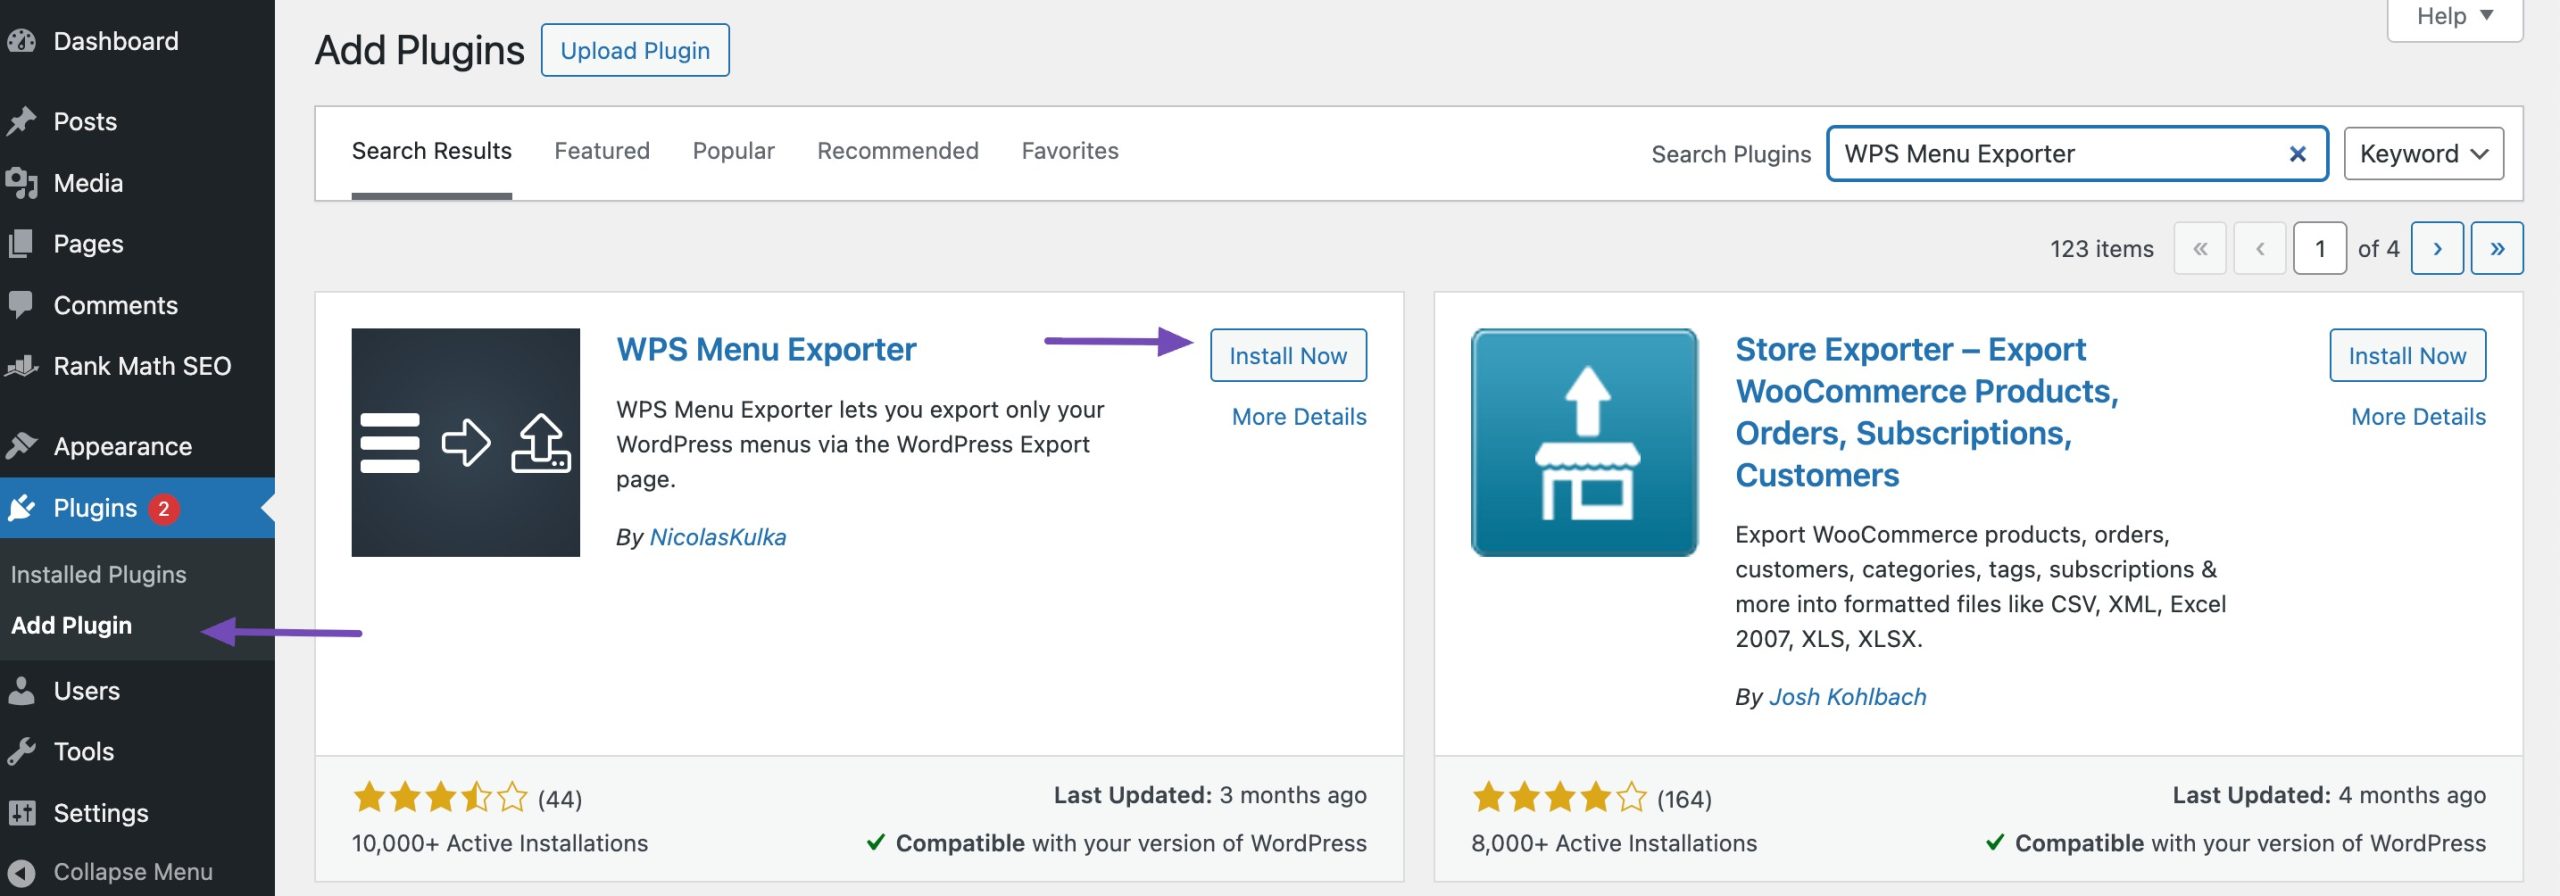
You need to install and activate the WPS Menu Exporter plugin from the Plugins → Add Plugin section of your WordPress dashboard. Refer to our dedicated tutorial to install and activate plugins in WordPress.
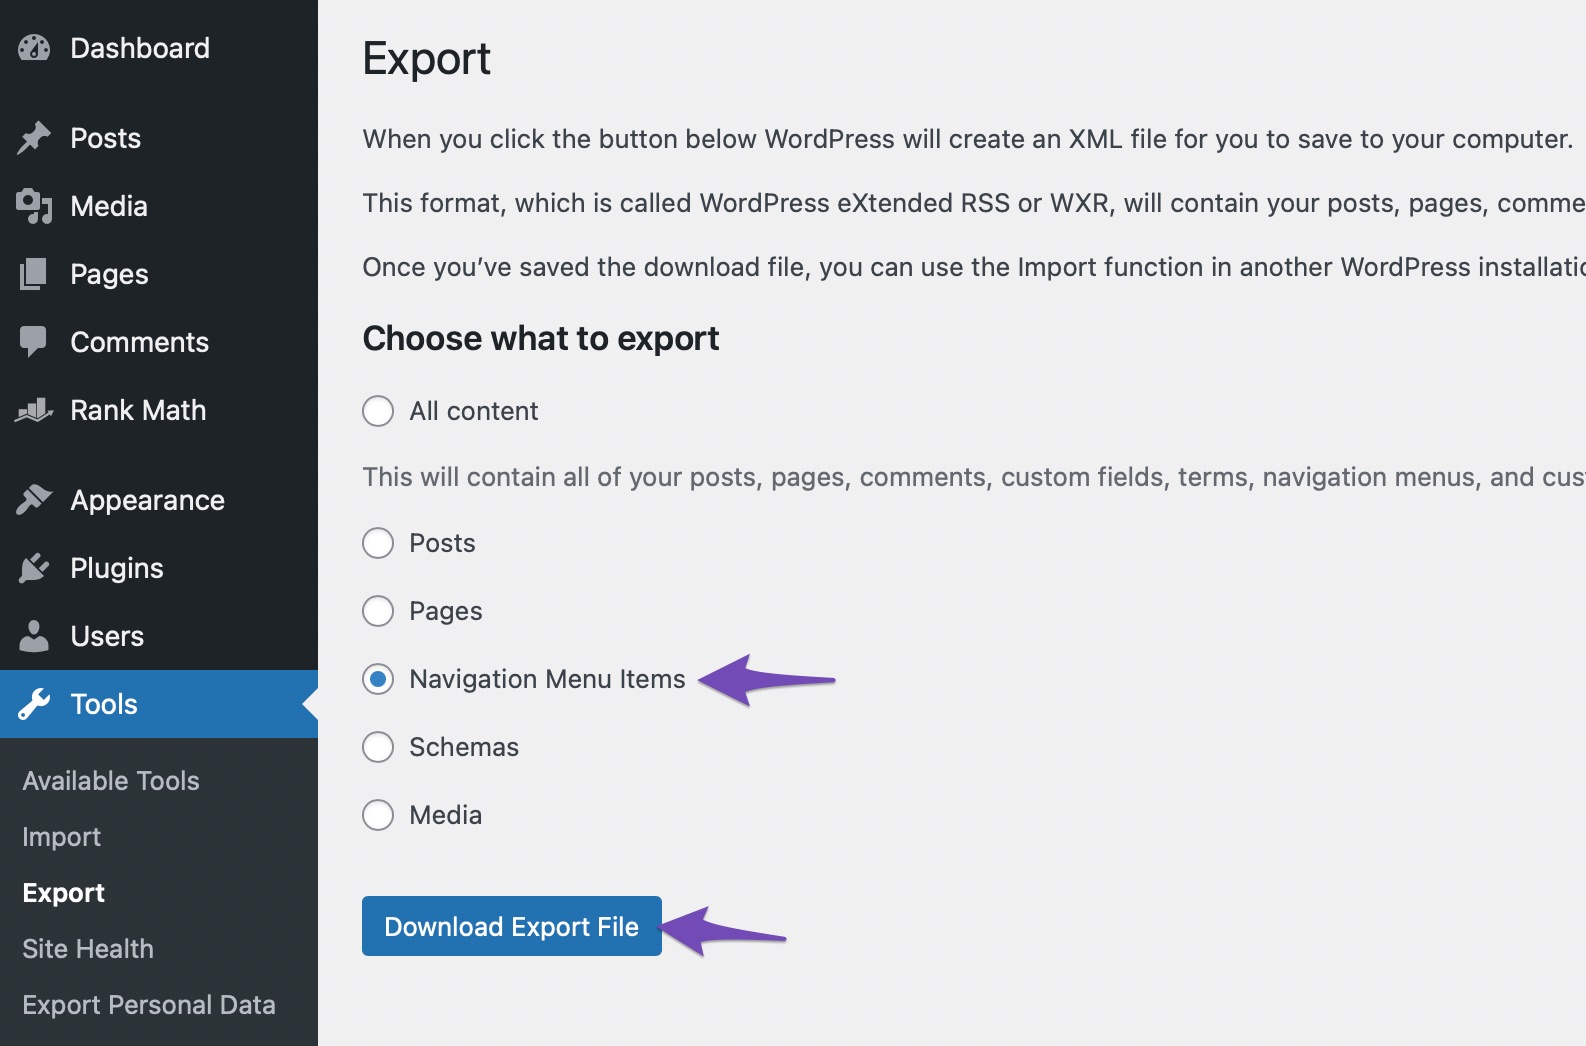
Once activated, navigate to Tools → Export page from your WordPress dashboard. With the WPS Menu Exporter plugin installed, you should see a field called Navigation Menu Items.
Any comments or posts on the menu will be included with your import/export functionality.
The next step is to select the Navigation Menu Items radio button and then click the Download Export File bouton.
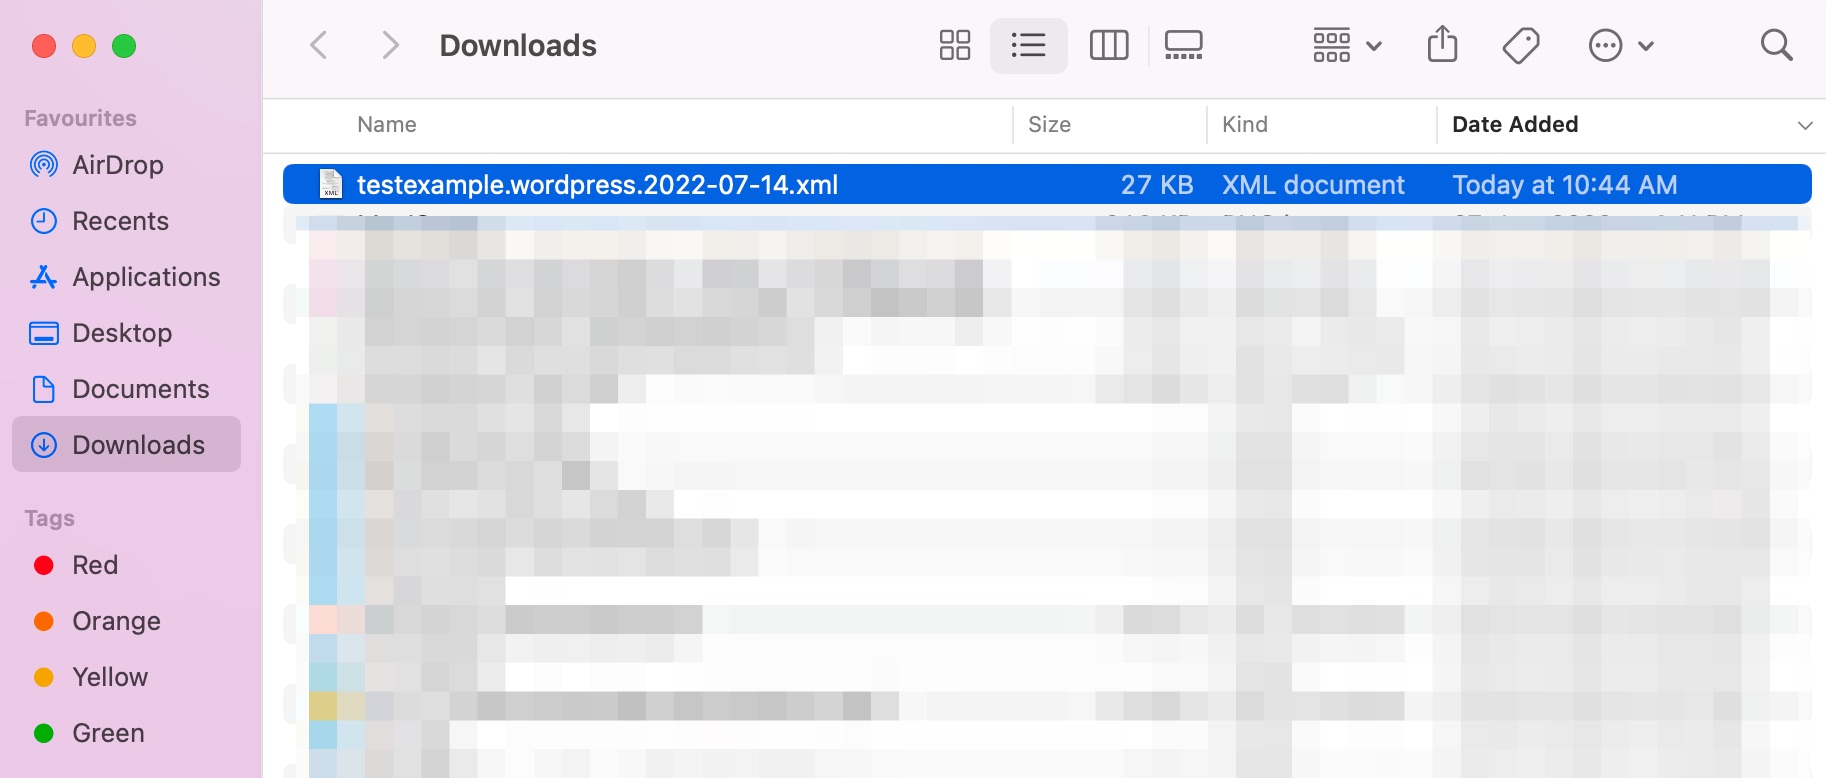
This helps you download the menu and any related files to your system. It will be saved as a file with the .xml extension. It will have the name site.wordpress.yyyy-mm-dd in it. The date is expressed as yyyy-mm-dd, and ‘site’ denotes the website.
2.2 Import the WordPress Menu
The .xml file you downloaded can be imported using the WordPress standard Import feature. It’s an easy process. You must upload the file containing your navigation menu to your new website.
Noter: Make sure there are no existing pages, even in the trash, with the same name as the pages you’re importing from the menu. Otherwise, the import tool might not be able to import those pages correctly.
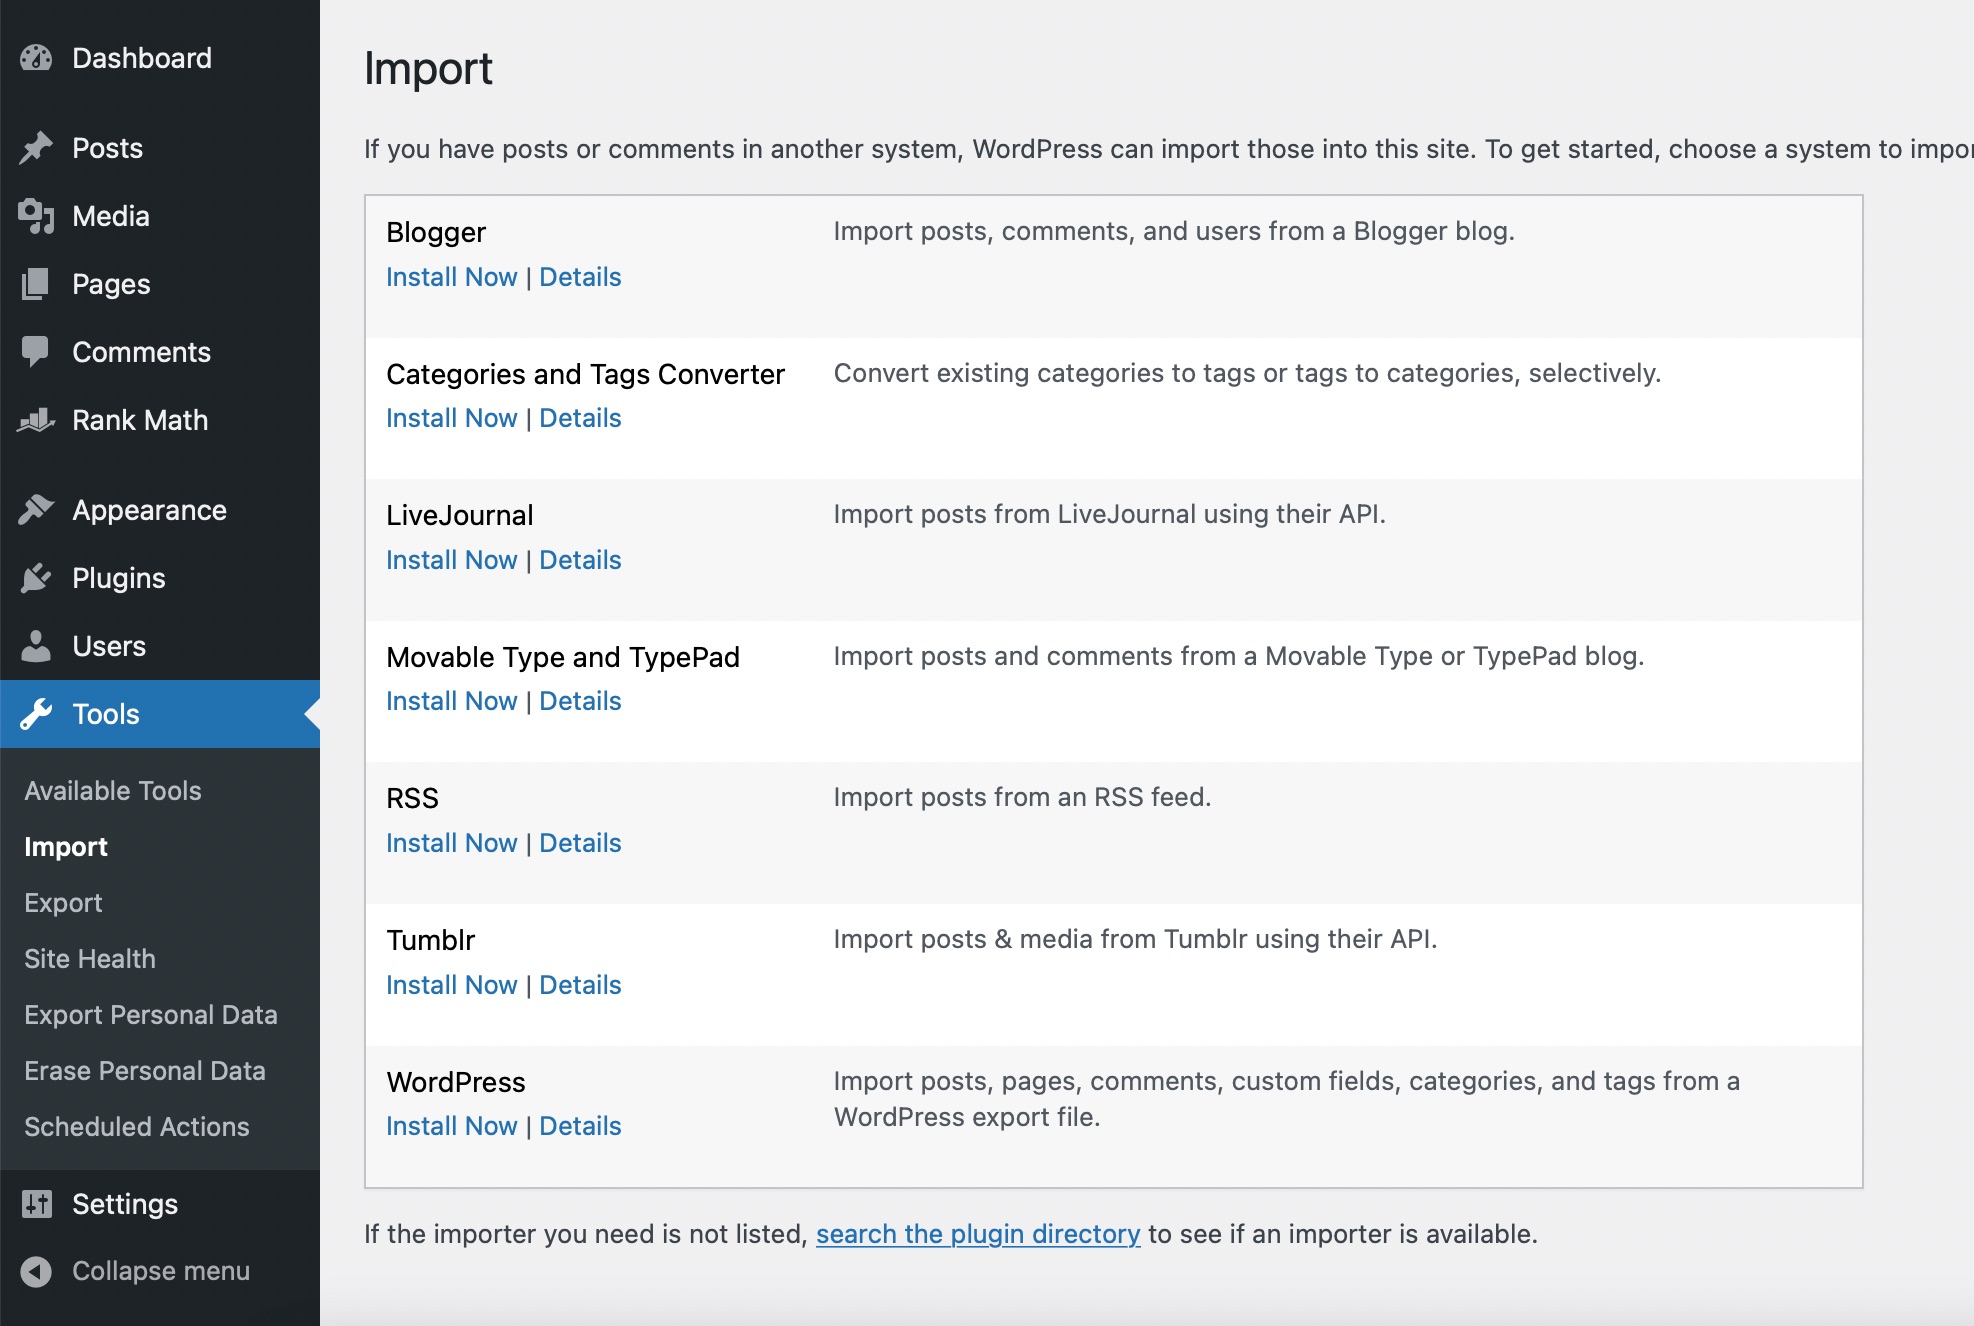
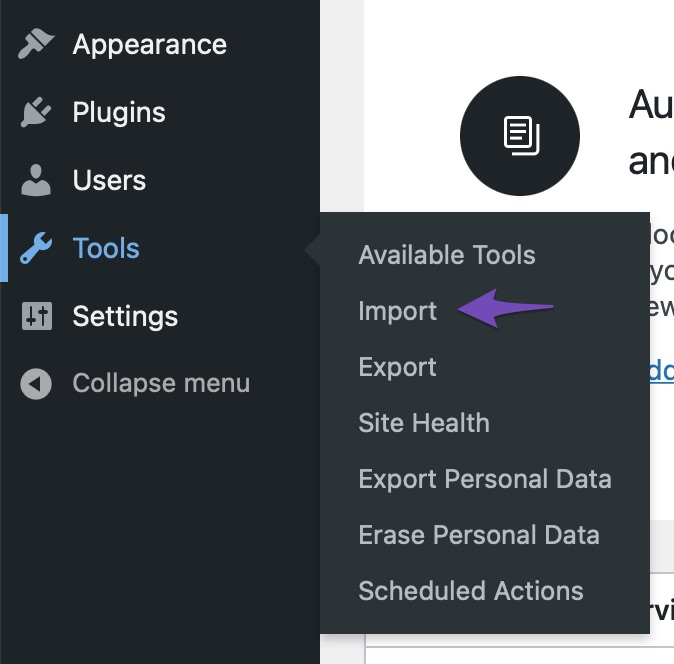
To begin with, log in to your WordPress dashboard on the new site where you want to import your menu. Then navigate to Tools → Import comme indiqué ci-dessous.
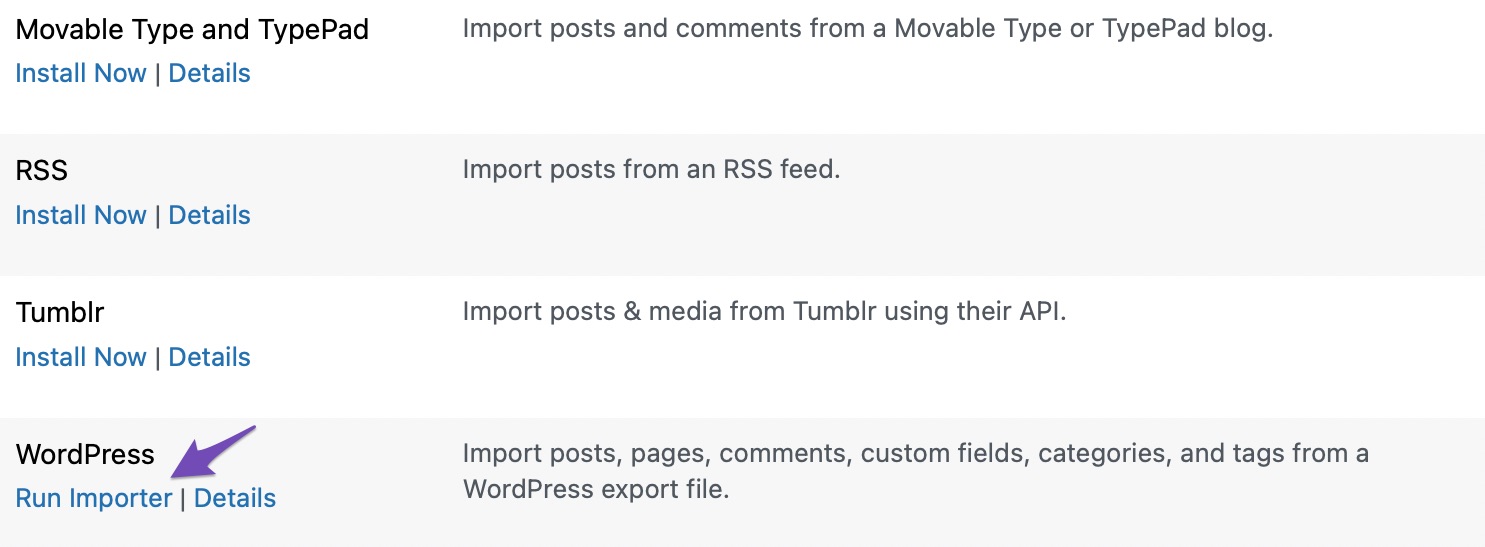
Scroll down to the Wordpress heading and click the Installer maintenant link as shown below.
Once the WordPress importer has been installed, the Installer maintenant link should be replaced with one that says Run Importer. Clique sur le Run Importer link.
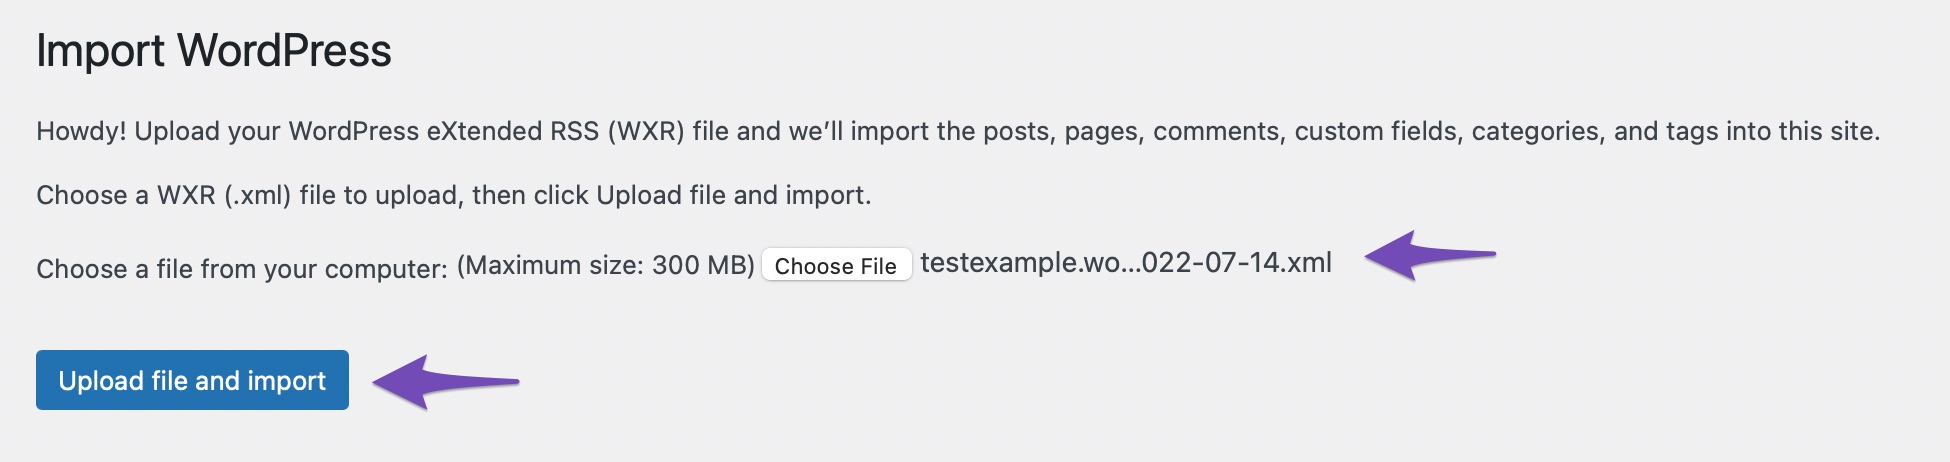
Next, you’ll see the Import WordPress screen. Click on the Choose File button to select the .xml file you downloaded earlier. Then click on the Upload file and import bouton.
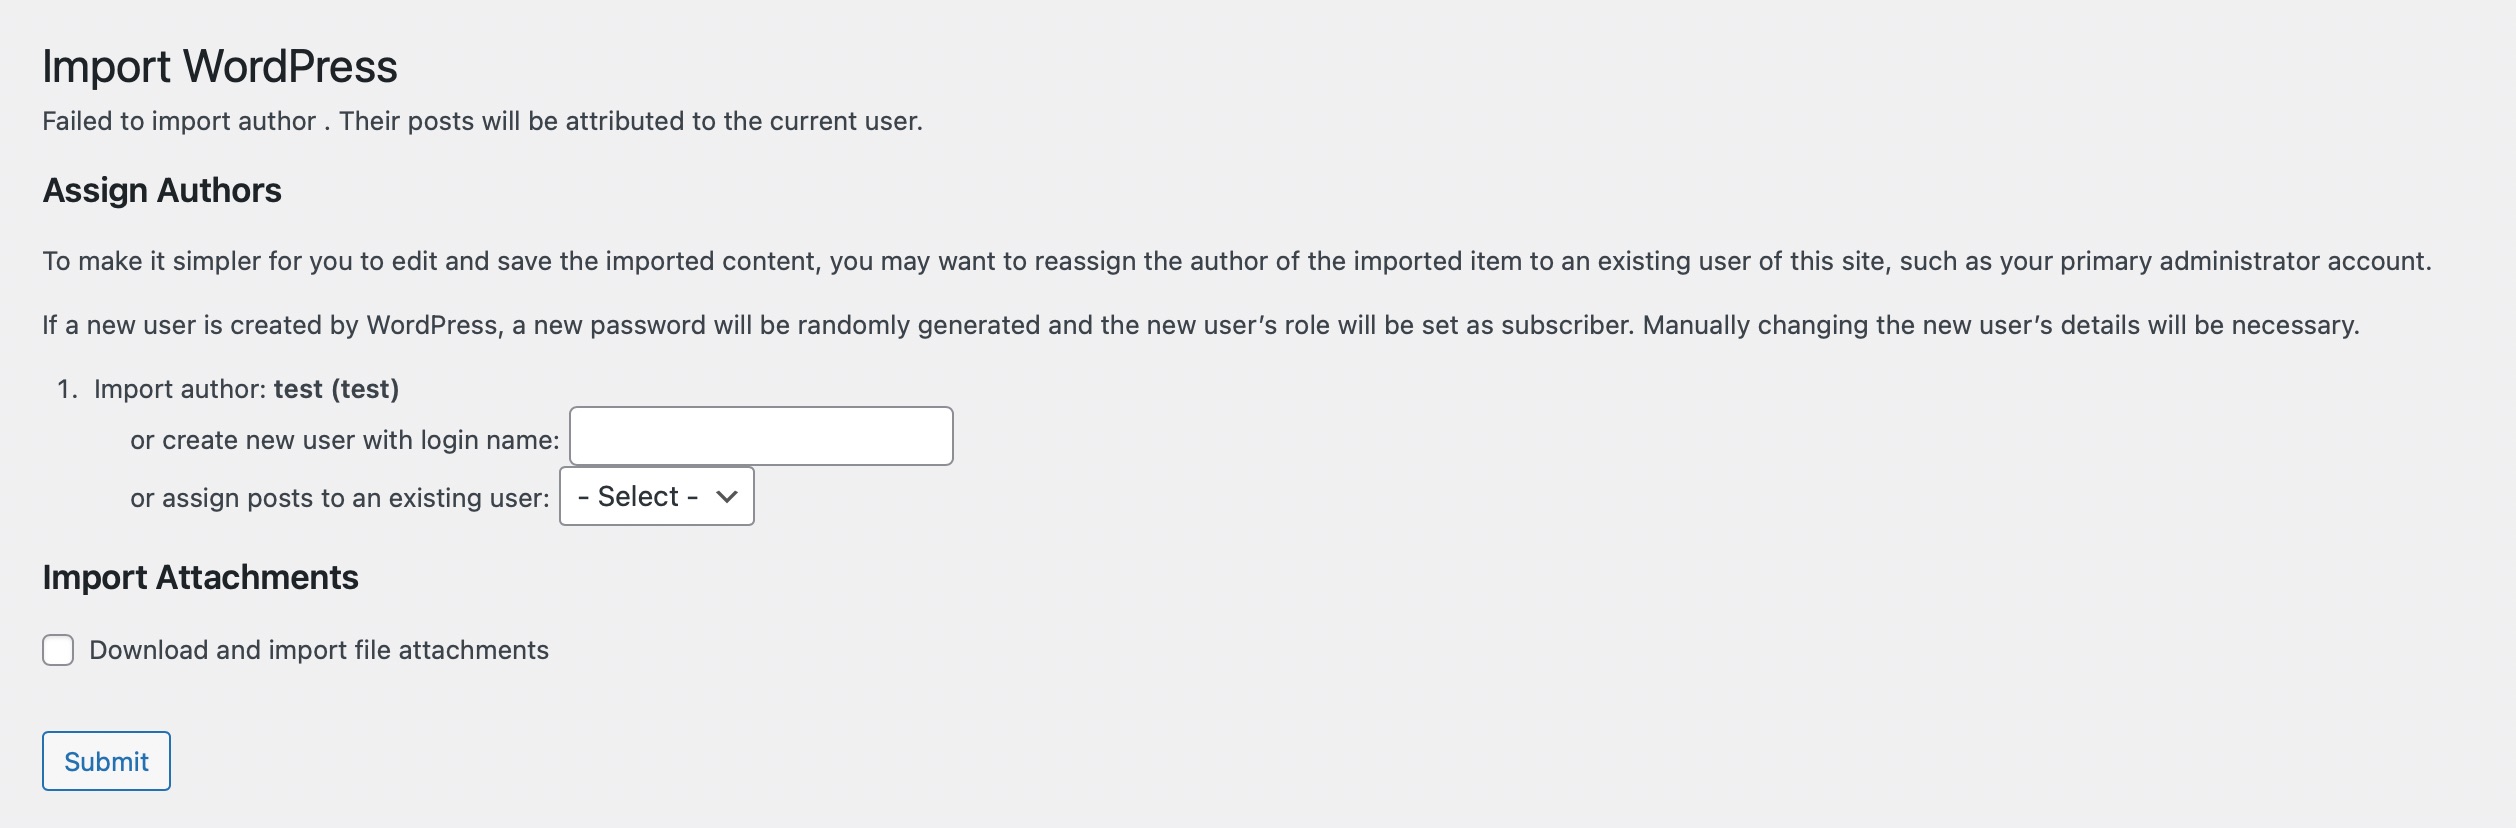
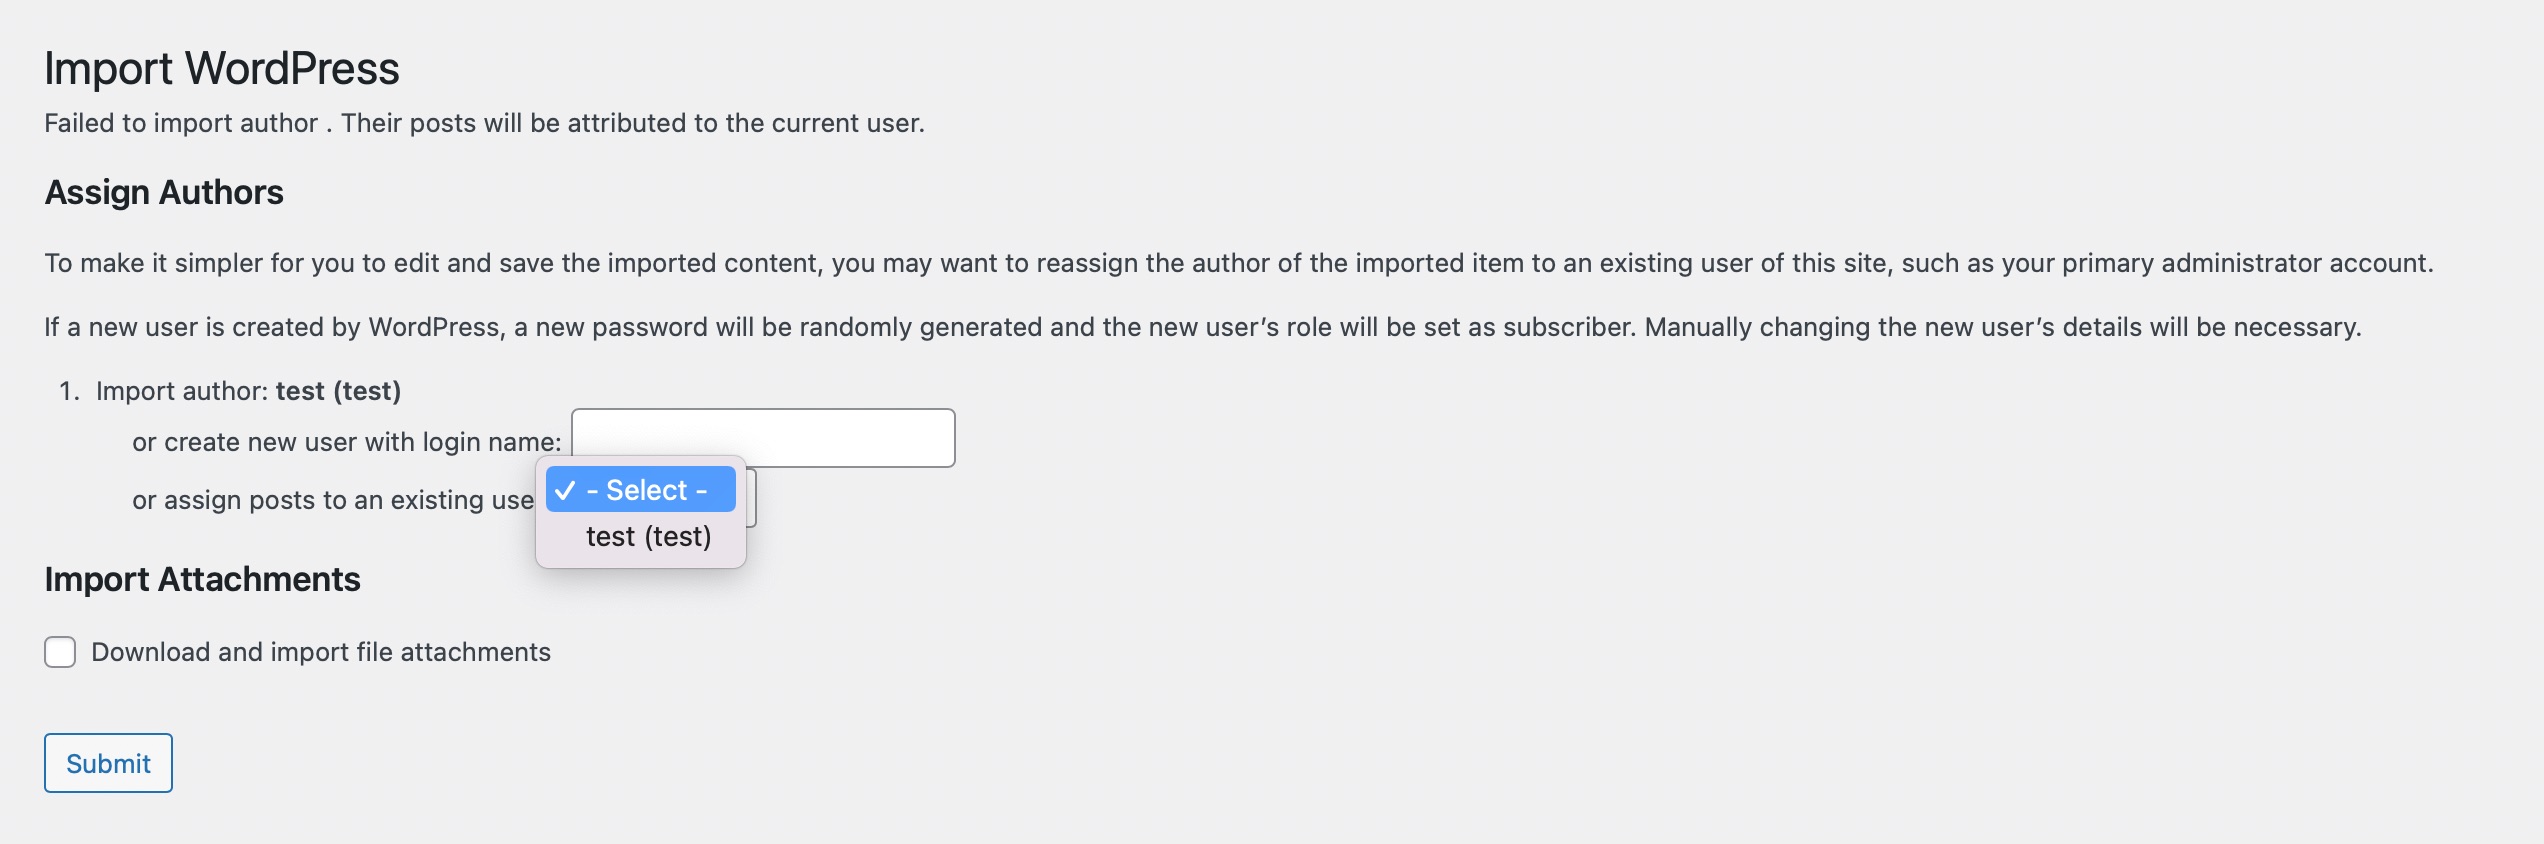
You then have to Assign Authors, as shown below. You can choose to assign posts to an existing user or create a new one. In most cases, it’ll make sense to set an existing user as the author rather than to create a new user.
Select the user name from the drop-down menu.
If you wish to re-use the pages’ content, check the Download and import file attachments box. With this, the images will be included in the import. Lastly, click on the Nous faire parvenir bouton.
Here’s how the success message will appear on your screen.
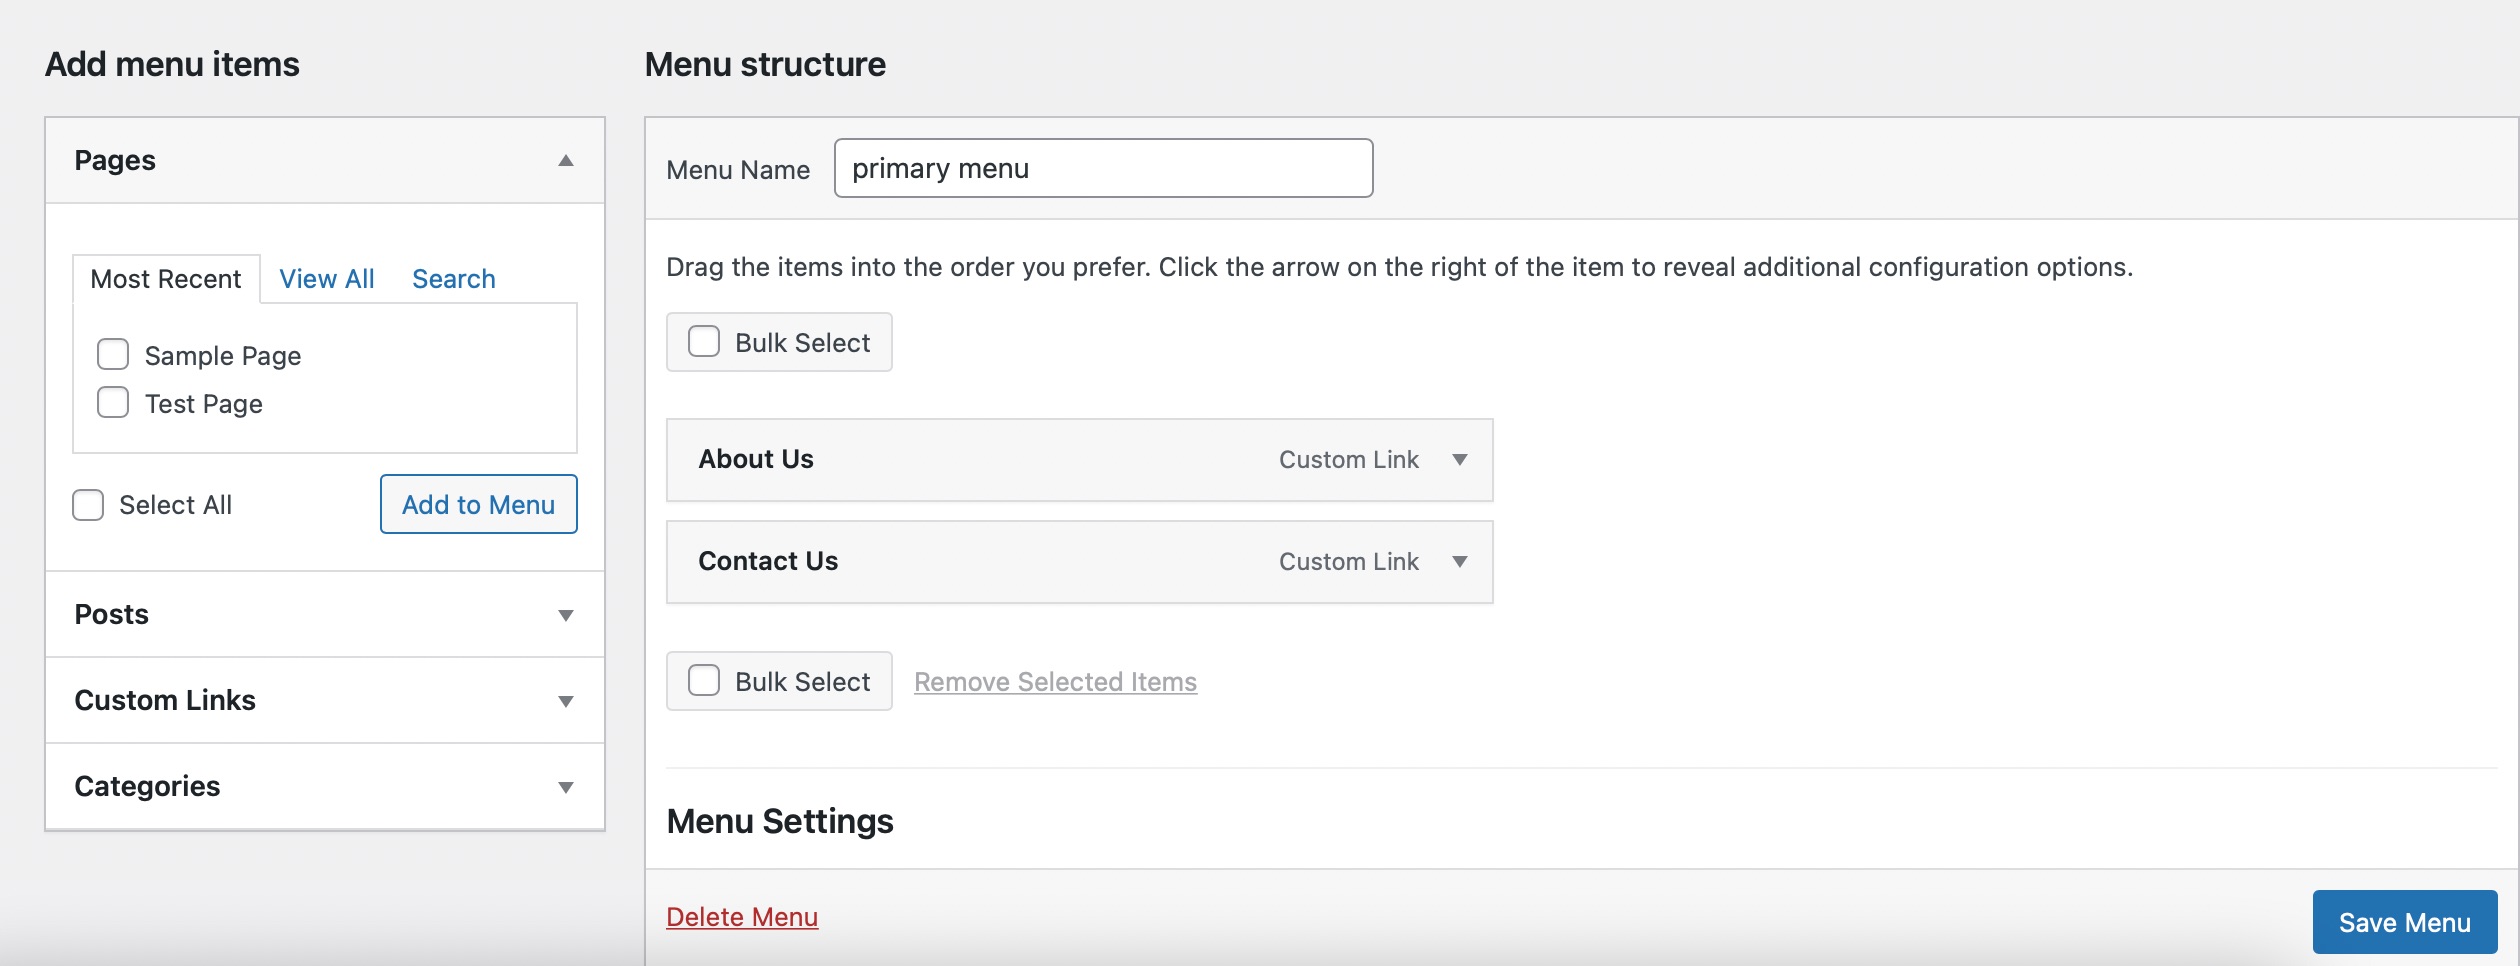
Now that your import is successful, you can look at the imported menu. To do so, navigate to Appearance → Menus from your WordPress dashboard. Here, you can verify that it is imported correctly.
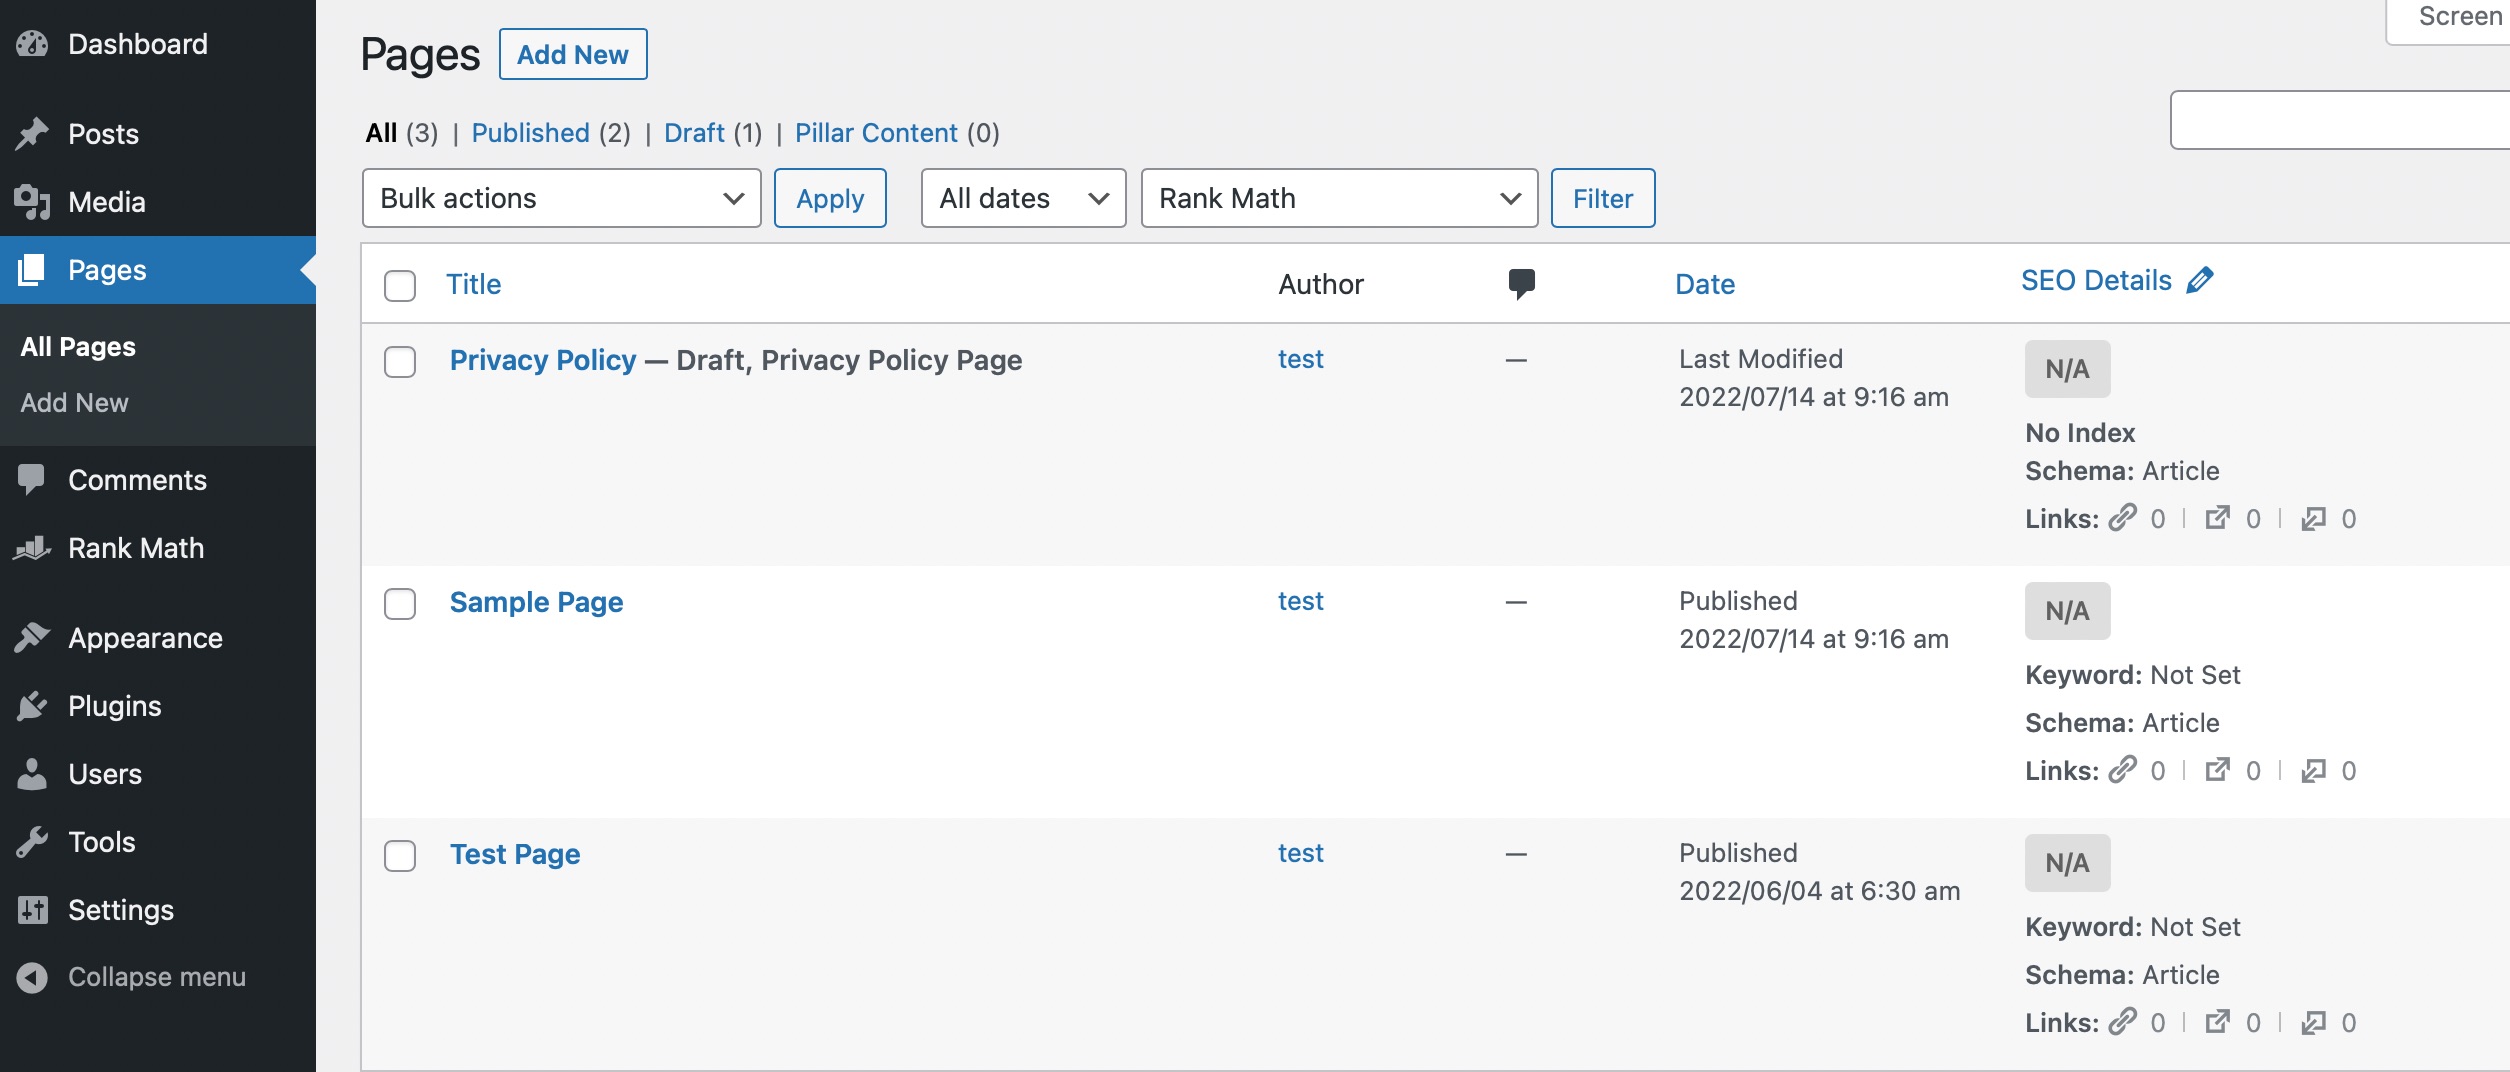
Clique le pages tab in your WordPress dashboard to view the new pages that have been imported along with the menu.
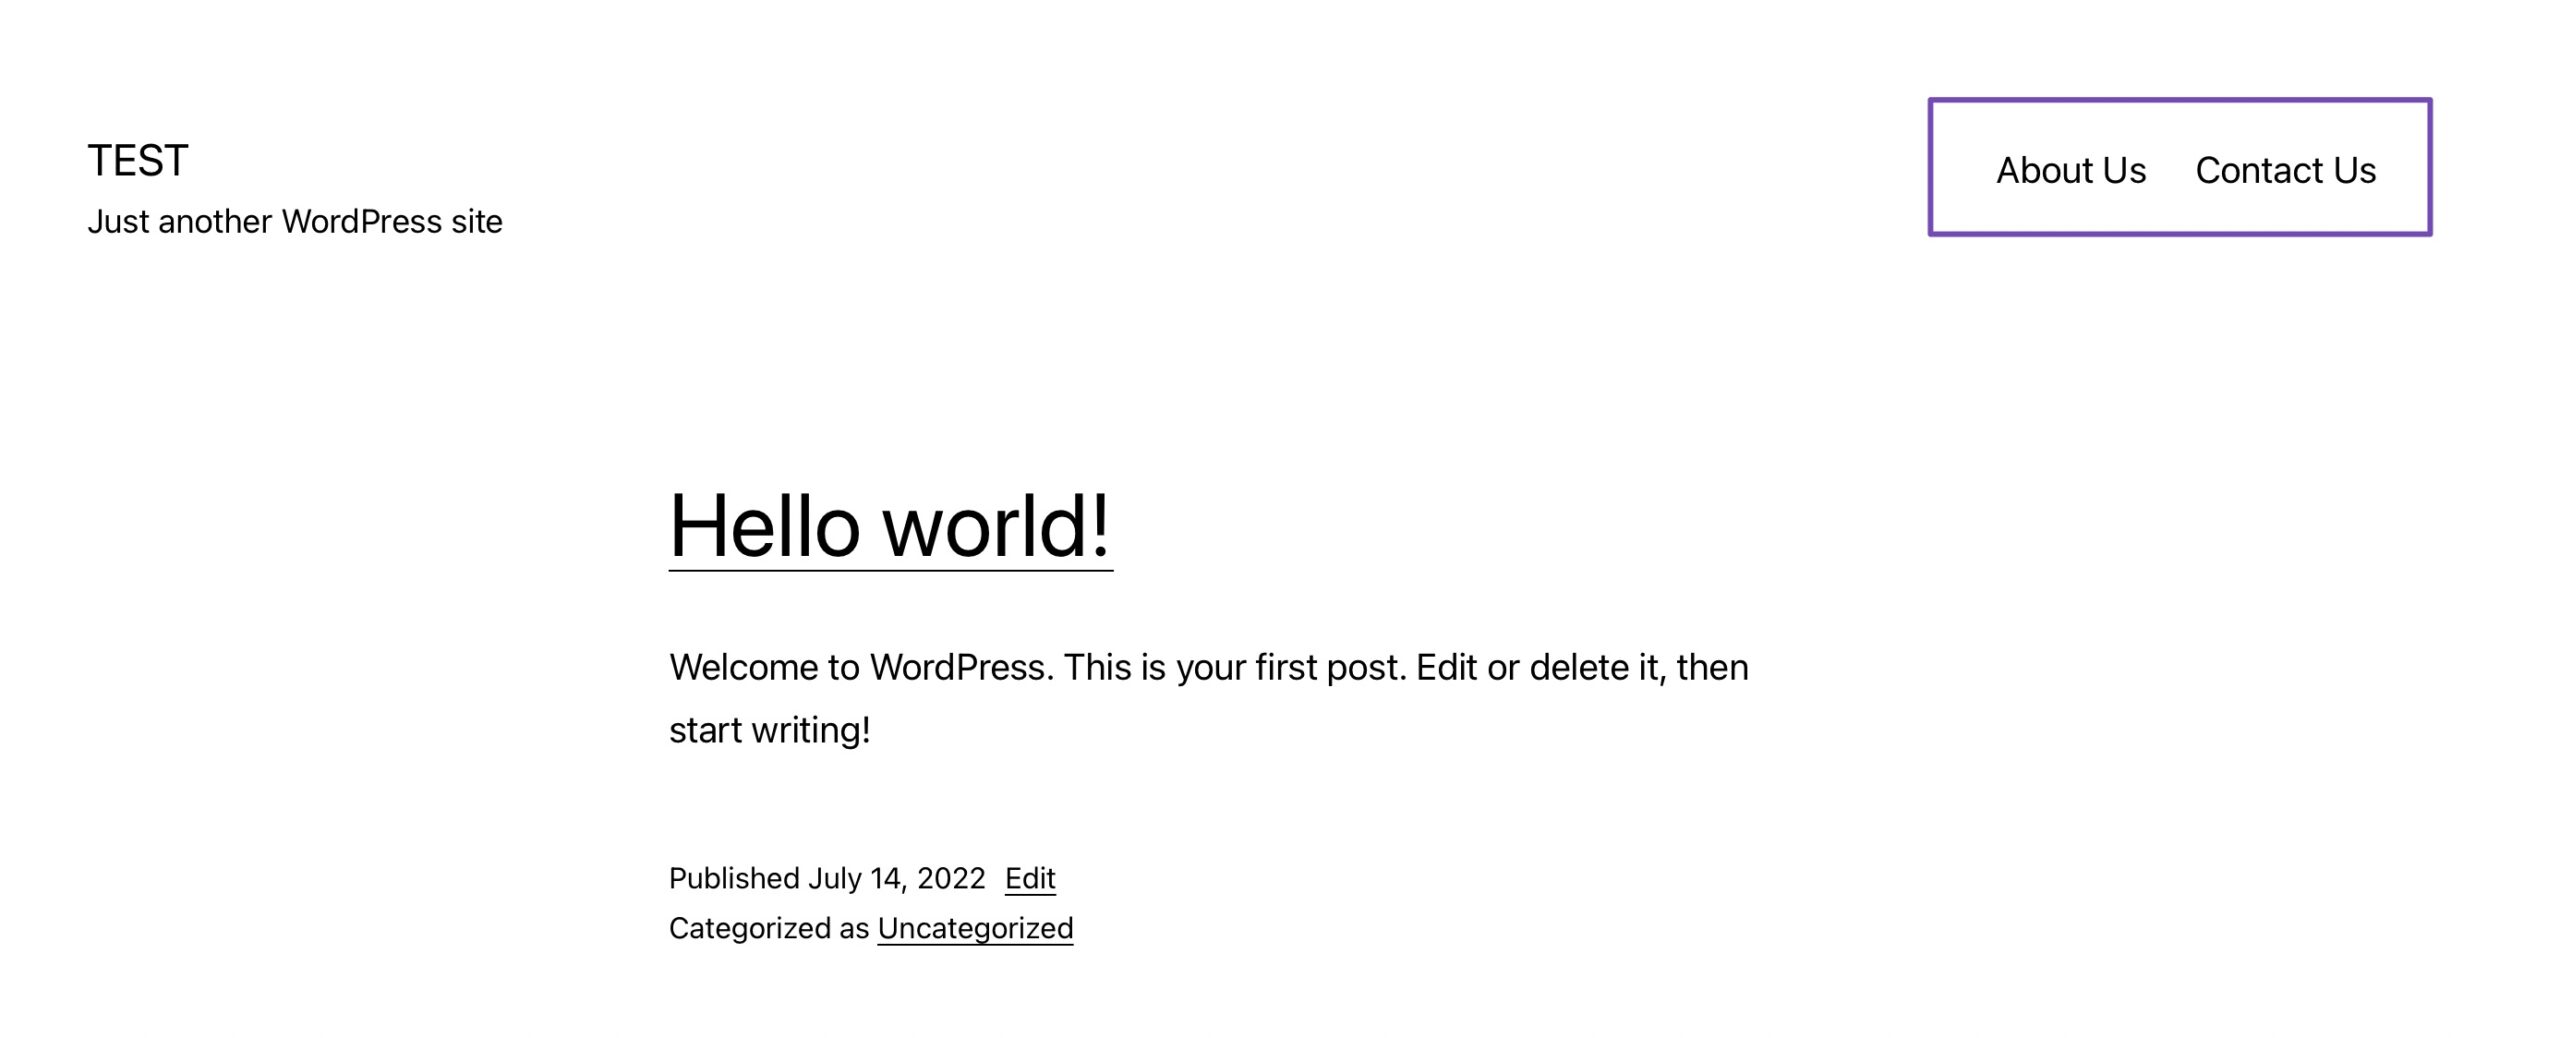
Make sure to take a look at the frontend of your site to see how the new menu looks!
3 Conclusion
Now you know how to import and export navigation menus in WordPress without spending hours rebuilding them.
This simple process helps you keep your menus consistent across sites, save valuable time, and avoid mistakes.
The next time you migrate a site or set up a new one, you’ll be ready to move your menus in just a few clicks.